Checking Burger Doneness Without Cutting Every Patty Open
Jordan Mitchell··11 min read
Burgers are weeknight gold—quick to cook, satisfying, and endlessly customizable. But the question of doneness can turn a simple dinner into a guessing game. No one wants to serve a hockey puck, but undercooked beef is a real food safety risk. Instead of slicing open every patty and losing those precious juices, you can master burger doneness temperature with a few reliable kitchen moves. Here’s how to sequence your evening for juicy, safe burgers every time, without the second-guessing or mess.
Burgers are sizzling and the kitchen smells like seared beef. You go to flip, and the question sets in—is it done? Is it safe? Cutting open a patty releases juices and can leave you with unevenly cooked burgers. But serving undercooked ground beef isn’t an option. What you need is a way to check burger doneness temperature that’s quick, accurate, and doesn’t compromise your dinner. This moment of doubt is common, especially when the patties look brown on the outside but the inside is still a mystery. The urge to press down with a spatula or slice one open is strong, but these moves can sabotage the juiciness and safety of your meal. Instead, a little planning and the right tools make all the difference.
Why Burger Doneness Temperature Matters—More Than Steak
Burgers aren’t steaks. With ground meat, bacteria that sit on the surface get mixed throughout. That’s why the USDA recommends a higher safe minimum internal temperature for ground beef: 160°F (71°C) throughout, not just in the middle. This is non-negotiable for food safety, especially if you’re cooking for kids, pregnant people, or anyone with a weakened immune system. Checking burger doneness temperature is about more than taste or juiciness—it’s about keeping everyone at the table safe. For reference, see the USDA’s Safe Minimum Internal Temperature Chart. Unlike steak, which can be safely eaten rare or medium-rare because the interior is sterile, ground beef must be cooked all the way through. When beef is ground, bacteria from the surface are distributed throughout the meat, so the only way to ensure safety is to reach the recommended temperature in the center. This is especially important for home cooks who might be tempted to serve burgers pink in the middle. The risk of foodborne illness from undercooked ground beef is real, and the consequences can be serious.
The Only Tool That Matters: Your Thermometer
Forget the finger test, squeezing, or guessing by color. The most reliable way to check burger doneness is with an instant-read food thermometer. Insert it sideways into the center of the patty—horizontally, not from the top—so you catch the coolest part. This avoids hitting hot spots on the edge and gives you a true reading. For a busy weeknight, a digital instant-read model is your best friend—fast, accurate, and easy to clean. Don’t have one? Put it on your short list. It’s as essential as a sharp knife or a good skillet. Relying on color alone can be misleading, as burgers can brown before reaching a safe temperature or remain pink even when fully cooked. The thermometer eliminates the guesswork, giving you confidence that your burgers are both safe and juicy. A quick wipe with hot, soapy water between checks keeps things sanitary and ready for the next patty.
Sequencing Your Cooking: When to Check the Temp
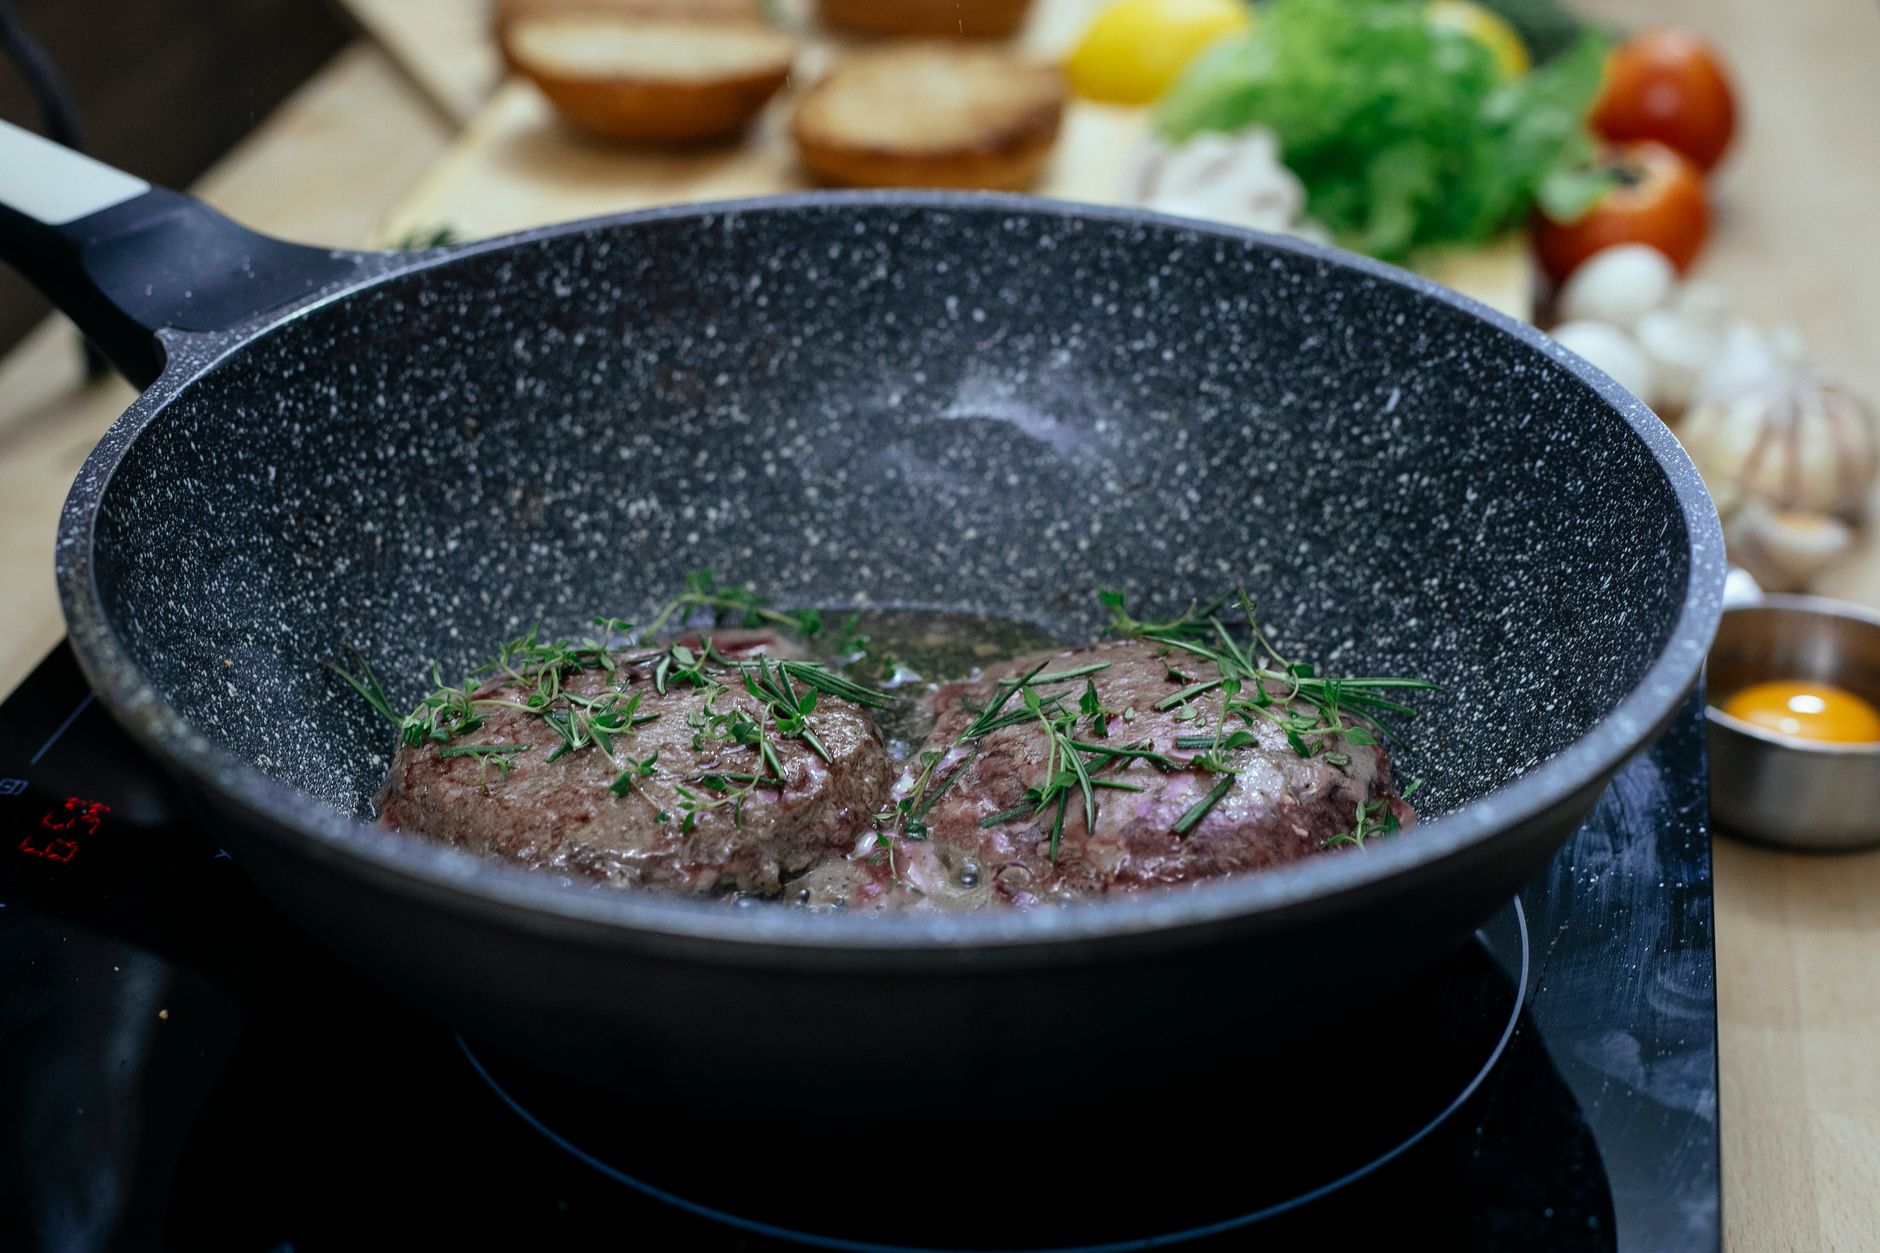
The rhythm of burger night is simple: shape, season, sear, flip. But when do you actually check? The best moment is when you think the burgers are almost done—about a minute before you expect to pull them off. Insert the thermometer into the side of each patty. If you’re making a batch, check the thickest one first. If it’s not at 160°F (71°C), give it another minute and check again. This way, you avoid overcooking while still hitting food-safe temperatures. Timing is everything. Start checking earlier rather than later, especially if you’re cooking on high heat or using thinner patties. Overcooked burgers can go from juicy to dry in less than a minute. Keep the thermometer handy and check each patty, especially if they vary in size or thickness. This step adds only seconds to your routine but guarantees peace of mind.
Carryover Cooking: The Hidden Heat
Burgers, like all meats, keep cooking after they leave the pan. This is called carryover cooking. If your thermometer reads just under 160°F, you might be tempted to pull the burgers early. But unlike a roast or steak, burgers are thin and lose heat fast, so don’t bank on much carryover. The safest approach is to let the thermometer be your final word: 160°F in the center, then off the heat. Carryover is minimal with burgers, so avoid the temptation to undercook and rely on resting to finish the job. If you’re grilling outside, wind and ambient temperature can cool burgers even faster, so be vigilant with your timing. Once the patties hit 160°F, transfer them to a clean plate and let them rest briefly before serving.
Keeping Things Juicy: Timing and Resting
It’s true, overcooked burgers can turn dry in a hurry. That’s why the timing of your temperature check matters. Pulling the burgers promptly at 160°F and letting them rest for a few minutes before serving helps juices redistribute. Resting isn’t just for roasts—give those patties a minute or two on a warm plate or loosely tented with foil. This brief pause makes a noticeable difference, especially on a busy weeknight. Resting allows the juices to settle back into the meat instead of spilling out onto the plate at first bite. While the burgers rest, use the time to toast buns, slice toppings, or tidy up the kitchen. The result: burgers that are both safe and satisfyingly juicy, ready to anchor any weeknight meal.
Clean Tools, Clean Hands, Clean Surfaces
Any time you handle raw ground beef, cross-contamination is a risk. Use separate plates and utensils for raw and cooked burgers, and wash your thermometer probe thoroughly after each use. This step is as important as hitting the right burger doneness temperature—no shortcuts here. The FDA’s kitchen safety guidelines offer a straightforward reminder: clean, separate, cook, and chill. Start by washing hands with soap and water before and after handling raw meat. Use a dedicated cutting board for forming patties, and keep raw meat away from fresh ingredients like lettuce and tomato. After cooking, wash all surfaces that came into contact with raw beef, including countertops and sink handles. Even the best-cooked burger can be undermined by a contaminated spatula or plate, so make cleanliness a non-negotiable part of your routine.
Leftover Burgers: Safe Storage and Reheating
Burgers don’t always disappear in one sitting. Store leftovers in shallow containers in the fridge within two hours of cooking. When reheating, make sure the internal temperature hits 165°F (74°C) to kill any lingering bacteria. For best texture, reheat gently—cover in the microwave or use a covered skillet with a splash of water. For more details on leftovers, see the USDA’s guidance on cooling, storage, and reheating. The key is rapid cooling: avoid stacking hot burgers in a deep container, which can keep the center warm and allow bacteria to multiply. Label leftovers with the date and aim to eat them within three to four days, per USDA cold storage recommendations. If you won’t eat them in that window, freeze for longer storage. When reheating, check the temperature with your thermometer—don’t rely on guesswork. This ensures leftovers are just as safe as the freshly cooked batch.
Sequencing a Realistic Burger Night
A successful burger night starts before the skillet heats up. Begin by gathering all ingredients and tools: ground beef, buns, toppings, seasonings, and, most importantly, a clean instant-read thermometer. Shape patties evenly, making a slight dimple in the center to promote even cooking. Preheat the skillet or grill to medium-high. While the cooking surface heats, prep toppings and set out clean plates for serving. Once patties hit the pan, resist the urge to press down—this squeezes out juices and can lead to dry burgers. Flip only once, and start checking the temperature as soon as the sides look cooked and juices begin to pool on the surface. Insert the thermometer sideways for an accurate reading. As soon as the thickest patty reaches 160°F, transfer all burgers to a clean plate. Let them rest while buns toast and toppings are arranged. Serve immediately, and store any leftovers promptly. The sequence is simple, but each step is purposeful: safety, juiciness, and efficiency all come together for a burger night that’s as stress-free as it is delicious.
Making Food Safety Routine
Food safety doesn’t have to be a chore. Integrate key steps into your cooking rhythm: wash hands before and after handling raw meat, keep raw and cooked foods separate, use a thermometer for every batch, and clean as you go. These habits become second nature with repetition. Over time, the thermometer feels as essential as the spatula, and the peace of mind is worth every second spent checking. The result is a kitchen routine that delivers on both taste and safety, every weeknight.
Weeknight Confidence: Putting It All Together
Checking burger doneness temperature isn’t another chore—it’s the step that removes all the guesswork from burger night. With a thermometer in hand and a rhythm to your cooking, you get juicy, safe burgers every time. No more cutting open patties, no more dry burgers, no more worry. The kitchen becomes a place of confidence, not second-guessing. If you’re looking to streamline other weeknight staples, try the method in /posts/one-pan-chicken-weeknight-method.
Jordan Mitchell leads FeedsAtlas coverage of weeknight cooking. The work focuses on clear methods, realistic timing, and meals that fit an ordinary evening without restaurant recaps or chef-speak.
Home cooks love the promise of sheet-pan dinners: less mess, fewer pans, and (in theory) beautifully caramelized vegetables. Too often, though, the broccoli is soft and gray, the carrots limp, and everything tastes like it spent too long in a sauna. The culprit isn’t your oven—it’s usually a matter of timing, spacing, and water. Crowd the pan and vegetables steam; give them room and they brown, even on a weeknight.
Anyone who’s tried to toss spaghetti with a homemade sauce and ended up with a pool at the bottom of the bowl knows: weeknight pasta can go wrong in ways that feel unfair. One of the most common frustrations is a sauce that slides off the noodles instead of coating them. The fix—the strategic use of pasta water—sounds simple, but plenty of home cooks hit snags. Here’s how to make pasta water work for you, why it matters, and what to do when it doesn’t go as planned.
You open the fridge, spot a container of cold rice, and wonder whether it’s destined to languish or can become dinner. The answer isn’t just about what you crave—it’s about food safety, timing, and what else you have on hand. This guide walks through the main ways to transform leftover rice into a full meal, with practical advice on when to choose each method, how to keep things safe, and how to make the most of your pantry. From speedy fried rice to simmered soups and hearty casseroles, here’s how to make leftover rice dinner-worthy.
Every home cook faces the weeknight chicken dilemma: Should you reach for a skillet, a sheet pan, or a Dutch oven? The right one-pan chicken method can mean the difference between a crisp, flavorful dinner and a soggy, stressful mess. Here is how to choose a style for a reliable weeknight chicken dinner, avoid limp vegetables or overcooked meat, and handle leftovers safely.
Every home cook faces the weekly reckoning: a fridge with limp vegetables, last night’s roast chicken bones, and a handful of cooked rice or pasta destined for the compost bin. Transforming these odds and ends into a comforting, cohesive meal can feel daunting on a weeknight. But soup from scraps isn’t just a thrifty trick—done right, it’s a deeply practical, satisfying way to feed yourself and reduce waste. Here’s how to assess your leftovers, ensure food safety, and build soup that tastes intentional, not accidental.
A stir fry can be the hero of a busy weeknight—unless the prep gets away from you. Learn how a sharp mise en place not only saves dinner from singed garlic and limp vegetables, but lets you cook confidently at high heat. This walkthrough covers the real steps and decisions, from knife work to food safety, that turn a frantic scramble into a smooth, sizzling finish.